SPECIAL NOTE: DO NOT USE HALF-HARD WIRE. Your pegs will snap.
Filigree Hoop Earrings
Materials Needed:
20 gauge silver plated copper wire or any wire you choose (I used 63815072 from Prima Bead)
Tools Required:
Wire Jig (34737052)
Round Nose Pliers
Flat Nose or Chain Nose Pliers
Marker
Emery Board or Wire Rounder
Skill Level: Beginner
Craft Time: 20 - 30 minutes
Skills Required:
Wire Jig
Instructions:
Measure, cut, and straighten two 10 inch pieces of wire. Form a loop at one end of each piece of wire. Set aside.
Place one piece of wire between the rows of pegs. Slide the loop all the way against the pegs.

Begin wrapping the wire around each peg forming a series of figure 8s.
Gently slide form off the jig.
Press the loops closed using flat or chain nose pliers. Adjust any odd shaped loops with round nose pliers.
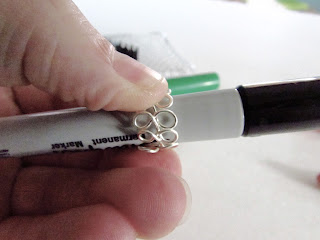
Wrap form around the barrel of a marker. Slip the tail into the end loop.
Make a slight bend in the very end of the wire using flat or chain nose pliers. Trim if necessary.
Smooth wire end with emery board or wire rounder.
Design Idea: Wire wrap crystals or beads into the loops of the filigree for a little bling.


