Total Pageviews

Friday, July 5, 2013

Friday Afternoon Project - Boho Chic Bracelet

Nothing better than a Friday afternoon, especially one right after a holiday.....except a Friday afternoon after a holiday that includes a FREE project!


Today's project is a Boho Chic leather and bead bracelet.  This was created using a Jewelry Class in a Box in Natural from Prima Bead.  


After flipping through the project pamphlet included in the kit, I decided to combine a couple to make a really cute bracelet.  Project time is about 20 minutes.  Skill level is beginner to intermediate.

Supplies from the kit:
1 - Round Twisted Rope Style Connector
1 - Cord End
1 - Lobster Claw Clasp
2 - 4mm Jump Rings
1 - 6mm Jump Ring
2 - crimp tubes
1 - Wooden Teal Bead
2 - Brown Speckled Red Acrylic Beads
1 - Brown Speckled Tan Acrylic Bead
2 - Antique Brass Colored Acrylic Spacer Beads
6 - Wooden Brown Daisy Spacer Beads
Tan leather
Flexible beading wire
Bead Mat

Tools Needed:
Crimping Pliers
Flush Cutters
Chain Nose Pliers
Measuring Tape
Scissors

Skills Needed:
Simple Knotting
Crimping


The leather will make up the majority of the bracelet.  Measure your wrist to determine length.  My wrist measures roughly 7 inches.  I went with an 8 inch bracelet for comfort.  
 
I cut off 9 inches of the leather and made a Lark's Head Knot (see photo on right) on to the connector.  The leather portion should make up the majority of the bracelet.

 
Attach a cord end to the ends of the leather using Chain Nose Pliers.  (See photo below left.) Attach a 4mm jump ring and a clasp to this end.


Attach a 4mm jump ring to a 6 mm jump ring.  Thread beading wire through the 4mm jump ring and center the ring in the middle of the piece of wire.  Slide on a crimp tube onto both ends of the wire and crimp. (See photo on right,)


Slide on one red bead, a brass spacer, five daisy spacers, a brass spacer, a teal bead, a tan bead, another red bead, and one more daisy and a crimp tube.  Run the ends of the wire through the metal connector end of the leather strand and back through the crimp tube.  Pass the wire back through the last daisy spacer and the red bead.  (See photo on right.) Crimp and trim off the extra wire.  Enjoy your new bracelet.


 You can mix and match the beads to suit your particular tastes as well. Have fun and enjoy your crafting afternoon.

Class In A Box REVAMP!

Last year, I had the opportunity as a Creative Circle Ambassador along with my fellow ambassadors to give feedback on Cousin Corporation's Jewelry Class in A Box kits that are marketed through its sister company, Prima Bead. These boxed kits contain a very lovely and large selection of beads, findings, a 3-In-One Tool that is color coordinated to the beads, a bead mat, and instruction booklet.  I have to say that most 3-in-One tools are a waste of money, but this one actually works great.  To be a small tool, it really holds up.  Great job, Cousin folks on that for sure!

We gave our feedback and Cousin listened.  They have revamped the line and just just introduced four new Jewelry Class In A Box kits.  The packaging became smaller and more durable.  The glued shut clam shell holders for the beads are gone and replaced with individual bags. No more cutting your fingers on the packaging or flying beads after the clam shell pops.  The beads are displayed in the box in a way that draws your interest very quickly to the product.  I love the added touch of the ribbon around the bead mat.  The packaging just has a more sleek and trendy look to them.

Each kit is designed to suit your individual tastes and styles.  There is a Casual, Classic, Shimmer, and Natural. The color coordinated beads and findings make for tons of jewelry making fun.


There are going to be some really nice step-by-step projects using each of these kits to follow.

Monday, June 17, 2013

Bead Swap with my Fellow Michaels Instructors

At the end of May a group of Michaels Craft Store jewelry instructors decided to do a bead swap.  We paired off and gathered up supplies to ship off to our swap partners.  The rules were simple:  1. raid your bead stash for a focal bead or pendant, coordinating accent beads and a clasp. 2. Ship in a timely manner the collection to your partner.  3. Only pick and send out things that you would love to receive and work with.

Actual reveal day is set of June 28th.  But since I was done, I decided to post it and walk you through my design process for this project.

Let's start with the amazing items I received.
I received some wooden beads, gorgeous pearls, a handmade Bird's Nest, white Turquoise, copper chain, Rose Gold plated copper ear wires and ball head pins, a beautiful copper clasp, a large enameled copper filigree flower, and some lovely little wire spirals (not pictured), plus a assortment of just goodies not necessarily part of the project (also not pictured).

I started by forming the filigree piece into a slight bowl using a wooden dapping block.  I wire wrapped the Bird's Nest to the filigree.  And that's when I drew a blank.  It has taken me nearly a month to come up with a design that I actually liked (mainly because I was being lazy).

Since I had the natural beads, I decided to throw in some leather, but I didn't know what I was going to do with it or how to incorporate it.  Then I thought that the pearls would look rather cool on the leather cording.  I reamed out seven of the larger pearls with my flex shaft (Dremel) so they would slide easily onto 2mm round leather lacing.  I don't recommend this if you can purchase some pearls with larger holes.  I have burns on my fingers from the pearls overheating during the drilling process.

I cut two long strands of the cording and did a hitch knot to attach the leather to one of the holes in the filigree.  On each strand I began to tie single overhand knots and slide on the pearls.  After each pearl, I tied an additional knot.  I did this in no particular pattern.  I tied all the leather strands together at the end and slide on one of the wire spirals.  I pinched the ends of the spiral to keep it in place on the leather and glued the knot using BeadFix jewelry adhesive.  I attached a gold plated cord end from my own supplies, trimmed the excess leather and added some more glue.

For the other side, I attached the copper link chain from my swap supplies with a handmade copper jump ring..  I attached flexible beading wire to another copper jump ring and then hooked that ring onto the chain.  I threaded a few wooden beads, white pearls and a few of my personal stash of colored pearls that looked like patinated copper.  I laced the strand of beads through the chain and crimped the end off and attached it to a jump ring at the end of the chain.

Now what?  I took another piece of flexible beading wire and strung on one of the white turquoise beads, wood beads and more of the colored copper pearls.  I attached that to the lovely copper toggle clasp.  On the other side, I took more of the leather cording and did a four strand braid attaching it with more of the gold plated cord ends.  It was a bit plain so I took some flexible beading wire and ran it through the braids adding in a two pearls and one of the wire spirals.  This end was attached to the second half of the toggle.

Something still was missing.  I added three dangles to the bottom of the filigree.  Two of which were white turquoise and the middle one was two wood beads and two white pearls.  I attached these with handmade jump rings.   And yet, something was missing.  I had one left over turquoise bead, and I wanted to use it some how.  I was going to make a chain out of copper washers, but didn't have any jump rings that size, and I really didn't want to make any more.  I looked at the jump rings I had on hand and decided to create a bit of chainmaille pieces and attach them to either side of the turquoise.  The piece wasn't quite as long as I would have liked, so I made to pearl connectors.  I attached this piece with jump rings on either side of the necklace.  Worked like a charm.  I love how it turned out.


This was a very fun and challenging experience.  I know I will participate again.  I can't wait to see everyone's pieces. Each of Michaels' instructor was so creative.


Saturday, June 15, 2013

Is It Too Soon to Think About Christmas? Nah!

We are half way to Christmas already.  The holiday season is about to smack us square in the face. There is some wonderful crafting new to share about Christmas. Cousin is about to roll out a new line to stores in just a few days called 'Tis The Season.  It is filled with lovely Christmas themed charms, glittery beads, tiny jingle bells, and tons of ideas.  There are rings specifically made for wine glass charms too with this line.  It's enough to get your creative juices flowing and be ahead of the game when Christmas parties comes around.

The Creative Circle Ambassadors were the first to receive the line so we could play around with it. Delving into this lot really got me in the Christmas spirit.  And yes, I got a bit carried away. Below you will find a video tutorial for some really simple and cute ornaments using this line as well as a few pictures of the items I made.


Friday, June 14, 2013

Prima Bead - Bead and Button Show Project - Part Two

This is the second part to my previous post about the Bead and Button Show project I did for Prima Bead.  You can read about the first one here.


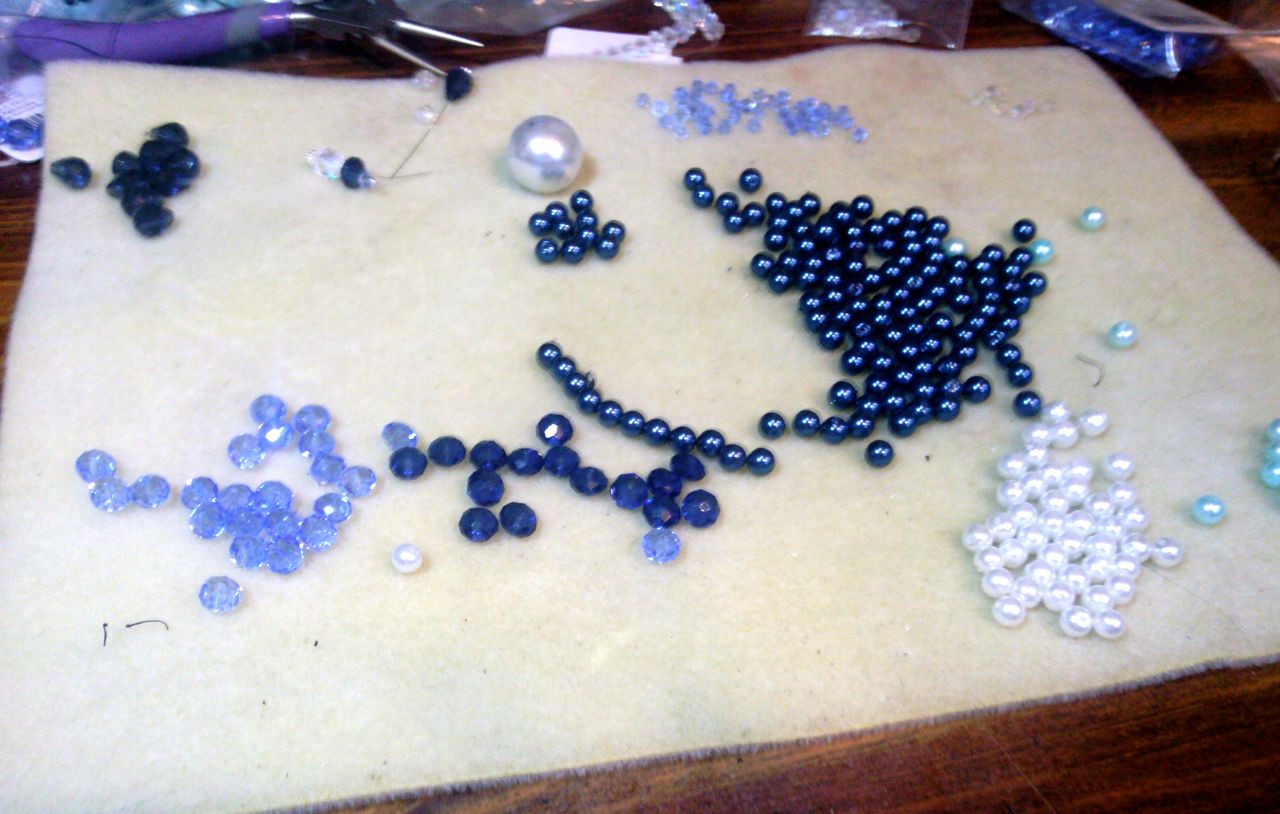
After my perfectly deep navy pearls arrived I started much like the other project with a Right Angle Weave stitch.  I did large sections of each color of pearls with various colored crystals added between the pearls.

This gave it a different look than the first one.  I then had this crazy notion to make something different for the focal.  I took one of the huge round pearls and encircled it crystal rondelles.  The tricky part was to create the focal without the thread showing through and looking all nasty.


Somehow it worked.   To attach it to the center of my right angle weaves, I did the band in two sections and then attached the ends to the rondelles using them as a way of back tracking to the point I supposed to start adding the crystals in between the pearls.  I couldn't believe that it actually worked.

I wanted to change up the way the main part of the necklace looked as compared to the first one.  This is where it got all fancy.

I laid out my pattern using Adobe Illustrator with the shapes the same size as the beads I was using to make sure my scale was correct.  I had to actually use a bit of Algebra to figure it all out so it could be like I wanted it.  Color coding really helped.
The easy part was done.  Now for actually implementing the design.  Piece by piece, it began to come together.


I created a second dangle almost identical to the one on the first necklace just because I liked it so much.  It also tied in to the main pearl in the collar.  It also helped to pull the collar straight.  Adding in the Sterling Silver chains also added the right about of contrast to the lovely colors.

I added three strands of the Sterling Silver chain in varying lengths and crossing them over each other.

There were some very minor changes to the design I originally created in Illustrator.  Some things only trial and error can fix.  Not everything on paper works in reality.
Side view of finished necklace

I discovered that it was way too short to actually be worn even though I had measured and double checked everything.  I had to cut the clasp off and add in some chain and another toggle clasp.  It worked out better in the end.  It added a bit of comfort to the back of the necklace.

Finished necklace


Tuesday, June 11, 2013

Prima Bead - Bead and Button Show Project - Part One

In early February, I posted about a new project for Cousin which would be our "biggest assignment to date."  I'm super excited and super nervous about being able to create something that will be displayed at such a prestigious event.

While I sorted my supplies, I ran into a problem.  The color of some of the pearls were off.  I had ordered dark blue/navy and what I received was dark teal/green color.  Turns out I had a mislabeled batch.  Oops.... I reached out to one of my contacts there at Cousin/Prima Bead and he quickly sprang into action to make sure the other pearls were labeled correctly for other customers and find me a perfect match for what I wanted.  Within a few days, I received my new goodies.  But the fact I had off colored items didn't stop me from creating a beautiful piece from the pearls.  So now I have two necklaces for Cousin to choose from.  Below are the progression of each necklace from idea conception to finished beauty.

The beginning of the first one:
This was the focal design I came up with and the rest of the necklace flowed around it.  Sterling Silver fancy head pin, filigree heart connector and eye pins were used with a 10x8mm Crystazzi Dark Sapphire teardrop bead, huge 20 mm glass pearl and a 6x8mm Crystazzi Light Sapphire rondelle.
I came up with a pattern using 6mm deep teal, light turquoise, and white glass pearls.  I knew I wanted to use a collar style necklace as the base for this piece to give it a Victorian feel.

I used Beadalon's WildFire Thermally Bonded Bead Weaving Thread in Frost 10 lb., 15mm with a #12 beading needle.


I created a Right Angle Weave using a base ring of four pearls then adding in three at a time until I reached the desired length.  I then went back in and added 4mm round A/B finished Swarovski clear crystals and 4mm bicone Crystazzi Light Sapphire crystals.


I added in dangles along the sides using 10x8mm Crystazzi Dark Sapphire and Clear A/B tear drops accented with 4mm bicone Crystazzi Light Sapphire crystals and 4mm bicone A/B clear crystals. I draped a Sterling Silver link chain from the Elegance Metal line in the design.

Bit by bit, it all came together.  I continued to add in various colored glass pearls, crystals, and even some Jewelry Basics acrylic beads.


Friday, May 10, 2013

Calling All Jewelry Designers


Cousin ANNOUNCES CALL FOR APPLICANTS FOR CREATIVE CIRCLE
Ambassador Program 


Five New Ambassadors To Be Selected To Join The Inaugural Group

FOR IMMEDIATE RELEASE
LARGO, Fl., May 10, 2013 – Cousin Corporation of America is pleased to announce a call for applicants for the Cousin Creative Circle™ Ambassador program for the 2013-14 term. Cousin is a premier manufacturer of jewelry making components that supplies products to craft stores, retail chain stores and professional jewelry makers all over the world.

The Cousin Creative Circle™ is a diverse group of talented jewelry makers who have a strong commitment to the craft of jewelry making and who use Cousin products because they are the best in the industry. These brand ambassadors have a platform to share ideas with the product development team, receive Cousin products to incorporate into their work and attend a team building retreat at Cousin Headquarters in Florida.

"Our Creative Circle program has absolutely surpassed our expectations," said Jeff Cousin, President. “We want to keep the craft of jewelry making relevant and maintain it as a growing art. The Ambassadors have shown thousands of people that jewelry making is accessible and rewarding, and as a result we have introduced those people to the Cousin brand.”

The selection committee will choose five additional Creative Circle Ambassadors to join the original members chosen last year. To be considered for the Cousin Creative Circle™, each applicant must complete a comprehensive application form and submit at least 3 images of their work. The deadline for submissions is Monday, June 17, 2013 at 11:59 p.m. EST. To apply, please visit www.cousin.com/CCC.

About Cousin
Cousin Corporation of America is a family-owned company founded in 1970 as Enterprise Art, a retail craft store in Largo, Florida. Today we are a premier wholesaler of jewelry making supplies. Our focus is to design, manufacture and provide quality jewelry making products at an exceptional value to customers who are inspired by the craft of jewelry making. For more information about Cousin Corporation of America, please visit www.cousin.com.